Poco F1 is the most compatible smartphone for Custom ROMs. The 3-year-old phone has allegedly got almost every Custom & Ported ROMs out there. The phone has even got Android 12 Beta 3 ported directly from the pixel devices. Above all, POCO F1 has gained official support from renowned Custom ROM sources such as Lineage OS, Pixel Experience, Derpfest and Corvus. According to reports from GSMarena, POCO F1 will get MIUI 12.5 soon. However, the phone has already got MIUI 12.5 through a ported ROM.
The latest one to join this fleet of Custom ROMs is the CalyxOS.
What is CalyxOS?
Calyx OS is a Custom ROM designed to provide the utmost privacy. CalyxOS was developed by Nicholas Merrill. He was the founder of Calyx Internet Access and the Calyx Institute. He successfully sued the FBI over the methodologies used by the agency to obtain private data. According to him “Privacy is a basic human right and in the same way that no one should be allowed to break into your home and read your diary, no one should be allowed to read your private online data”. He then founded Calyx Institute, a non-profit organisation to educate the public about privacy in digital communications and to develop tools that anyone can use.
CalyxOS: How it Secures Privacy?
The main aim of Calyx OS is to minimise tracking and surveillance. These are done by manufacturers, service providers, internet service providers, advertising companies and malicious hackers.
• In-Built Firewall: CalyxOS do this by blocking the unwanted trackers using the in-built firewall. The built-in firewall allows you to restrict what level of internet access that you want each of your apps to have.
• App Permissions: CalyxOS offers its users to have supreme control over app permissions including visualisation of how many
times each permission of your phone has been accessed
• Built-In VPN: It also has a built-in VPN to make the internet traffic untraceable by anyone including vendors and third party services.
• Encrypted Calling: One of the best features of CalyxOS is the encrypted calling feature. Instead of using the proprietary dialer that can be easily snooped on, Calyx uses a signal call that is end-to-end encrypted.
• Vanishing Messages: Text messages in CalyxOS are encrypted and a timer can be set so they disappear
In this way, Calyx almost replaced every aspect of the OS with a secured path. CalyxOS even blocked Google from accessing your private data in every possible way. It replaced Google apps such as Chrome, Google Maps, Play store through which Google is accessing user info for advertisement purposes.
CalyxOS Port POCO F1
Due to these in-built and enhanced privacy features, CalyxOS was featured in one of the videos of Mr. whosetheboss, a famous tech YouTuber. According to him, the team behind CalyxOS is a mere 11 people and with a format like this, it’s tough to take that and scale up and make advertising campaigns and get compatibility with all phones. Therefore, right now CalyxOS only works and is officially available on Google Pixel devices only.
However, it is successfully ported to POCO F1, since POCO F1 has got every Custom ROM covered. The ROM was ported to POCO F1 by DevMashru. He got a Telegram channel and a support group for this OS. Therefore, consider joining them for more updates. You can also join by using the link.
How to Install CalyxOS on POCO F1?
To install CalyxOS on POCO F1, you have to
- Unlock the bootloader.
- Install Custom Recovery.
Unlocking The Bootloader
If you don’t know what is a bootloader, then I encourage you to read this article. To unlock the bootloader of POCO X3 Pro, all you need to do is follow the steps given below.
- Download USB Drivers: Download the USB drivers given in the link below.
- Enable USB Debugging and OEM Unlock: To unlock the bootloader, you need to enable the USB Debugging and also need to enable OEM to unlock option. To do these, all you need to do is enable the developer options. You can enable them by following this guide.
-
- On your phone, open the Settings app. Look for the “About” Phone menu and Tap on it
- You may see the device build number/mini version, tap on it multiple times until you see the “You are now a developer” pop-up flashes on the screen.
- If you have enabled the developer option, now go back to settings again
- After that, open the Additional Settings menu – Developer option
- Enable the options “USB Debugging” and “OEM unlocks” there.
- Go back and select “Mi Unlock Status” and click on “Add Account” and give your MI Account details and wait for a minute to bind.
-
- Download Mi Unlock: After that, all you need to do is unlock the bootloader by using Mi Unlock. You can download and install the software from the link given below.
- Unlocking Bootloader: Enter your device in fastboot mode by pressing the Volume down key + Power button and connect your device to your PC. (Make sure the drivers are downloaded and enabled in your PC). Click the Unlock button. You will be prompted with a new message where you need to click on the Unlock anyway button. After that, you will see a message stating “Unlocked successfully”.
Installing Custom Recovery:
Mobile recovery is a built-in program on mobile devices. It will be installed by the manufacturer itself to install the operating system. Unlocking the bootloader helps you to override this stock recovery with the custom recovery.
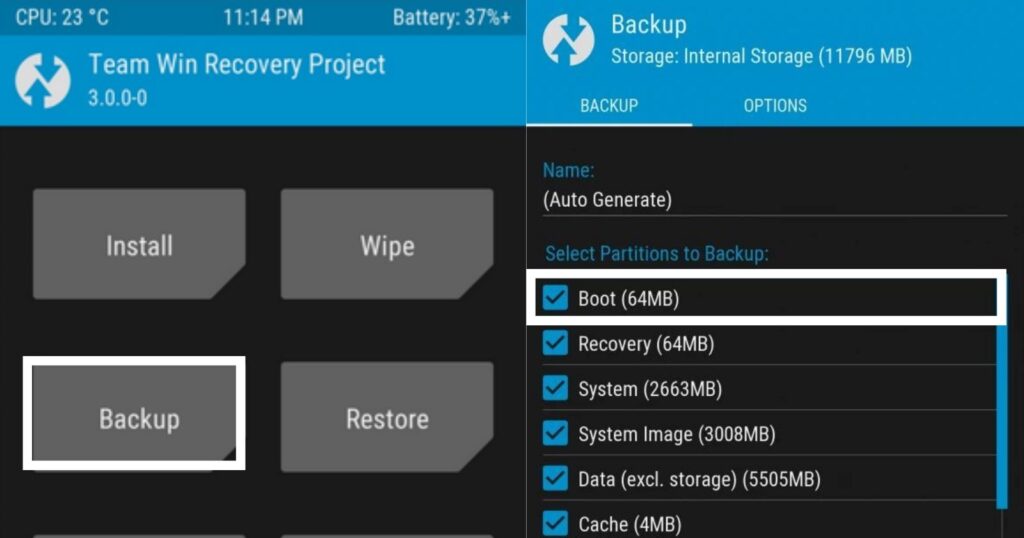
Custom recoveries are similar to your stock recovery. They can also be used to install operating systems. However, there’s a slight difference between these two. The Stock recoveries on your phones were developed and deployed by the device manufacturers. On the other hand, Custom Recoveries were developed by coding enthusiasts and ROM developers. For instance, TWRP (Team Win Recovery Project) and Orange Fox Recoveries fall under this category. You can use TWRP for this. The official TWRP link was provided below.

CalyxOS Installation
After all that, all you need to do is download the OS & Firmware zip file and save them to your memory card. Please note that installing OS through phone memory is not recommended as there is a higher chance of data erase.
- Once you download and move the OS file, place your phone in recovery mode. You can do it by pressing Power + Vol up keys.
- After entering into recovery mode, select “Wipe” and then choose “Advanced Wipe”.
- Select “Dalvik, Cache, System, Vendor & Data” from the given option.
- After wiping the data, choose “Install” and locate the “Firmware” file stored in your card.
- After installing the firmware, go back and select “Install” again and this time locate the “Calyx OS” file.
- That’s it, the OS gets installed and please note that the first boot will take some time. Therefore, be patient
That’s all for now. Thanks for reading through the end. If you like our content, share them with your friends. Every share will help us to be motivated. For more interesting news and reveals related to tech, follow us on our telegram channel. We haunt interesting news every day on the Internet.


Discussion about this post